Kubota Zero Turn Mower Maintenance and Care
Owning a zero-turn mower is a large investment, and owning a large investment makes it wise to know how to care for it properly. You may not think about mower maintenance before hopping on the mower and complete your chores.
Mower maintenance and care is extremely important in keeping your mower alive and running for years to come. Below are some zero-turn mower maintenance and care tips.
Zero Turn Mower Maintenance Tips
When properly cared for, a Kubota zero-turn mower can last for many years. To keep your zero-turn mower running, Country Sales and Service has put together some tips and a maintenance schedule for you.
Begin the Year with New Gasoline
Having new and fresh gasoline in your mower can be essential to the way your mower runs. Over time the gas will break down and cause your mower not to perform properly and eventually quit running. To prevent these issues, run the remaining gas out or drain the gas out at the end of each mowing season. By doing so, this will ensure you are running fresh gasoline in your mower.
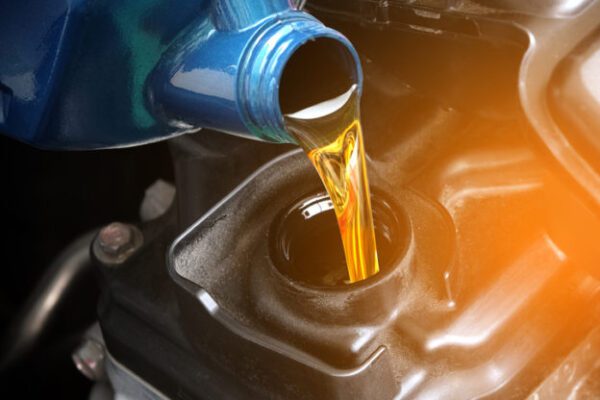
Proper Oil Changes
Before you start using your mower for the season, you will need to change the oil. Old oil can ruin your engine and shorten your mower’s engine life. If you continue to run your mower with old oil, this can cause maintenance issues in the future. Mechanics often recommend that you change the oil in your zero-turn mower every 100 hours of service or once every year – whichever is first.
When you change your oil, you must allow the engine to cool down. The oil can be hot and cause severe skin burns.
How to Change Zero Turn Mower Oil
- Undo the mowers drain hose, place the hose down and remove the drain plug as well as the oil level dipstick. Now, the old oil can be drained out even if the engine is warm.
- After the oil has been drained, install the drain plug, and put the hose back on the hook.
- Fill the mower up with new oil to the upper level of the dipstick.
- Lastly, to check the oil level – Remove the dipstick, wipe it clean with a paper towel, and re-insert it in and remove it again. Here is where you will see what the oil level is. It should be between the 2 marks.
When you do change your oil on your own, be sure not to overfill it.
Sharpen Mower Blades
Mower blades are no different than any other blades. Over time with use, the blades will dull. Using a dull mower blade will only tear the grass instead of cutting it. Sharpening your blades at least 2 to 3 times a year can help keep your lawn looking professional and well maintained.
Sharpening your blades can be dangerous. If you decide to take this task on yourself, follow all safety precautions to avoid serious injury. Even if you believe your mower’s blades are dull, they can be sharp enough to cause damage, so be sure you are wearing gloves, or you use something to grab the blade.
How to sharpen blades:
- Before replacing or checking the blades, you must first remove any grass or mud from the top and inside the mower. Be sure to clean the belt cover, or this can reduce the belt’s life of use.
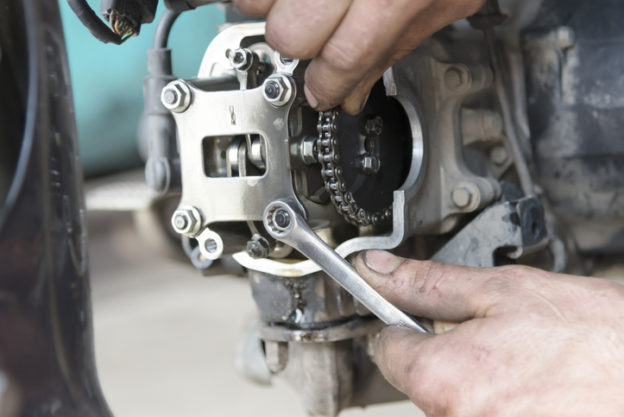
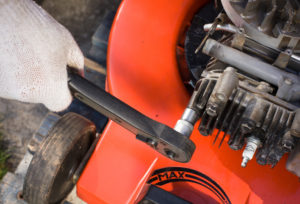
- Next, lose the blade bolts. Put a piece of wood between the mower housing and blade to stop the spindle from moving while removing the blade bolts. Be sure to use the correct size of the socket wrench to tighten or loosen the blade.
- Clamp the blade securely and use a mill file to file the original bevel until it is sharp.
- Once this is complete, you will need to check the blade balance. To do so, put a small rod in the center hole. If the blade is not completely balanced, continue to file the blade until balanced.
- Pass the spline boss through the plate, blade, and 2 cup washers, and then tighten the bolt.
- Lastly, ensure the cup washer has not been flattened or worn out. If so, this can cause the blade to slip. Be sure to replace the 2 cup washers if they are damaged.
Proper Maintenance Schedule
Before Each Use | After 10 Hours | After 25 Hours | After 50 Hours | After 100 Hours | Before Storing | |
Inspect engine intake screen/cover | X |
|
|
|
|
|
Check engine oil | X |
|
|
|
|
|
Inspect air filter for dirty, loose, or damaged parts | X |
|
|
|
|
|
Clean and oil pre-cleaner (if applicable) |
|
| X |
|
|
|
Replace air filter element |
|
|
|
| X |
|
Change engine oil and replace the oil filter |
|
|
| X |
|
|
Clean battery terminals |
| X |
|
|
| X |
Lube front pivot axle and caster axles |
| X |
|
|
| X |
Clean engine cooling fins |
|
| X |
|
| X |
Lube deck wheels |
|
| X |
|
| X |
Check spark plug condition and gap |
|
|
|
| X | X |
Replace fuel filter |
|
|
|
| X |
|